Using the Scratch Pad
1. - Accessing the Scratch Pad

A. - To access the Scratch Pad feature, navigate to the bottom bar and select the Scratch Pads button. This action will open the Scratch Pad view for use.
2. - Creating and Deleting Scratch Pads

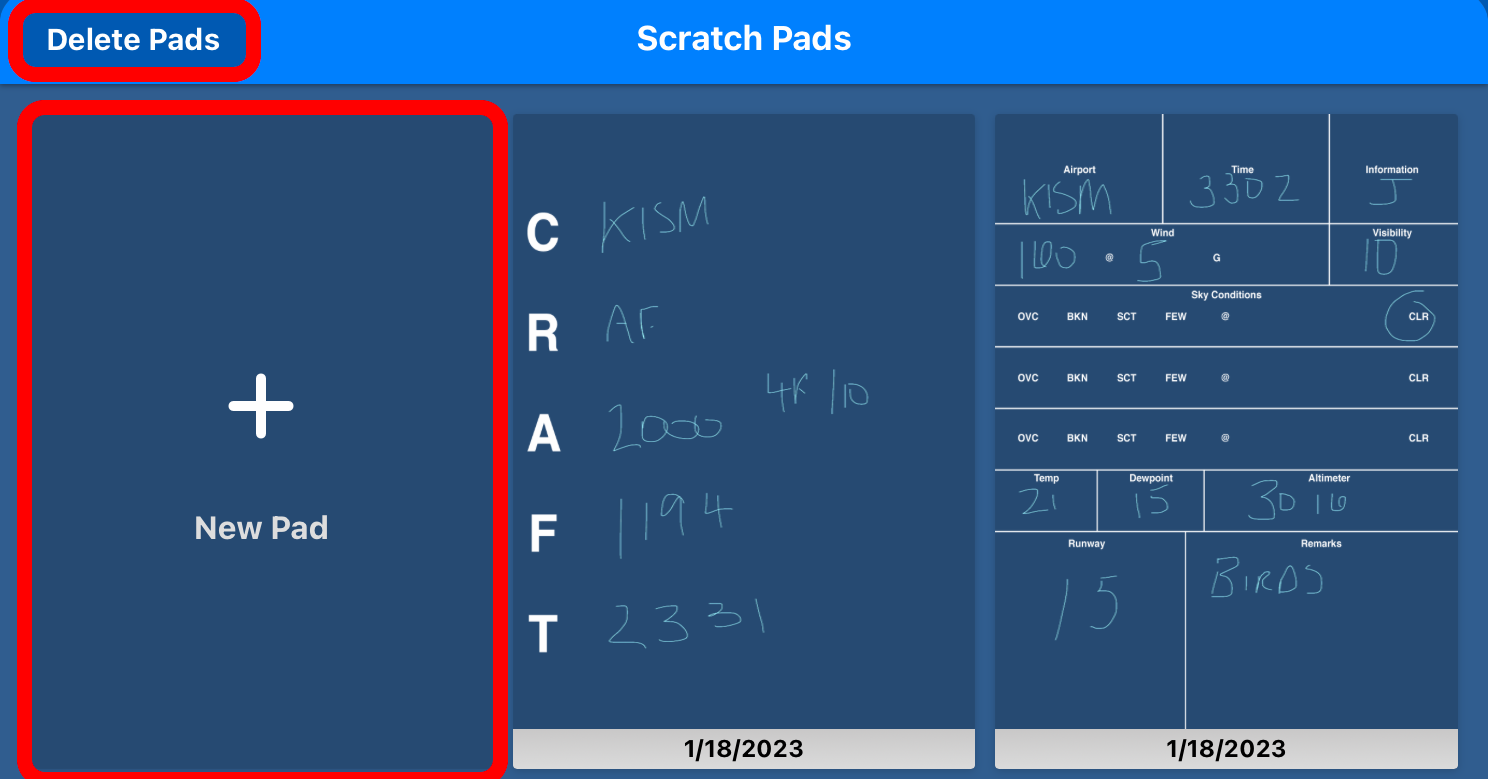
A. - To create a new Scratch Pad. Press the New Pad button located on the scratch pad view. This will always be located on the top left of the view.
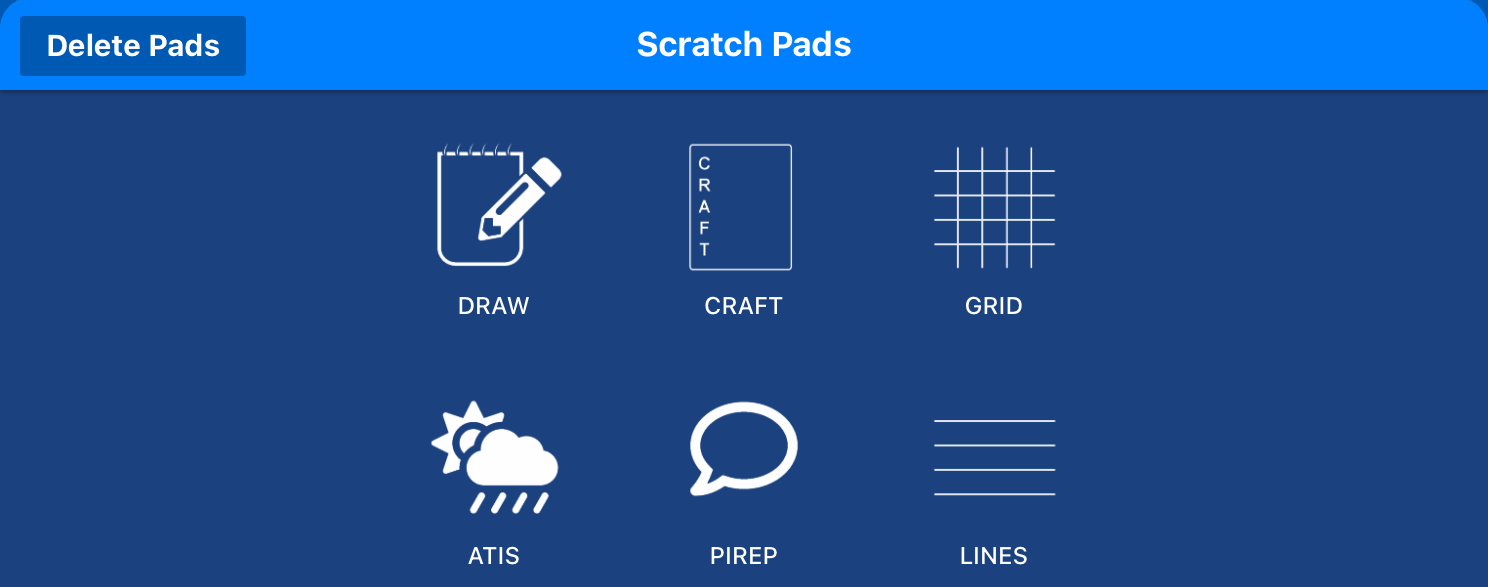
i. - When you press the New Pad button, you will be given the option to select from a blank document using the DRAW pad, or select a preset scratch pad templates that are designed to speed up the note-taking process with common templates such as ATIS & Craft.

B. - To delete a scratch pad, press the Delete Pads button at the top left of the window.

You will see a trash can icon appear on the top left of every pad you have previously created. Press this icon and you will be prompted to confirm that you want to delete the pad.

3. - Scratch Pad Tools
Inside every scratch pad, located on the top bar, are your scratch pad tools.

A. - Eraser

i. - The eraser icon will allow you to quickly remove any drawings that you have added to the Scratch Pad.
B. - Pen Settings

i. - The pen icon will allow you to draw on the scratch pad.
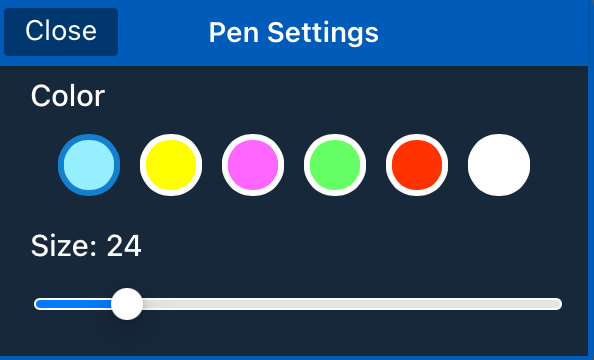
ii. - While the pen icon is selected, tap the pen icon again to pull up the pen settings. This will allow you to change the color and size of the pen. Click close or anywhere on the scratch pad to close the pen settings.

C. - Undo / Redo
i. - The undo icon will revert the last performed action. Each time you press the icon, it will continue to remove each step you have taken. History is reset when you exit the scratch pad.

ii. - The redo icon will reapply the last undone action.

D. - Share
i. - The share button will allow you to use the built-in share functionality of your device, giving you the ability to share your scratch pad via your messaging services, or simply save it to your photos. These options very depending on your device.


